Create a questionnaire
The questionnaire page allows you to easily configure personalized questionnaires.
To create a questionnaire :
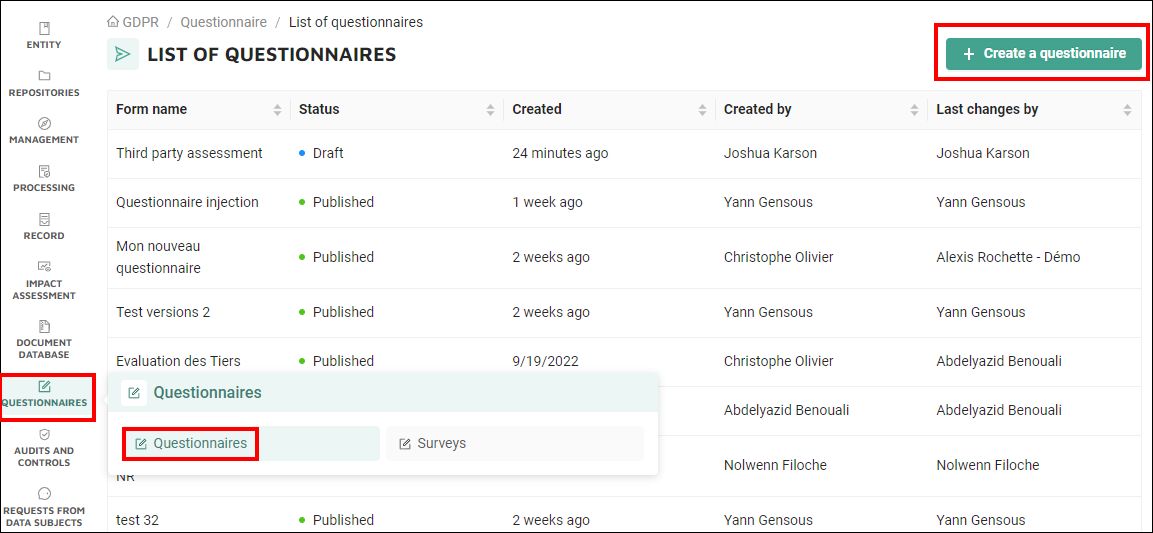
- In the sidebar, click Questionnaires > Questionnaires and click the Create a questionnaire button.
2. In the Create a questionnaire dialog box, give the questionnaire a name and click Create.
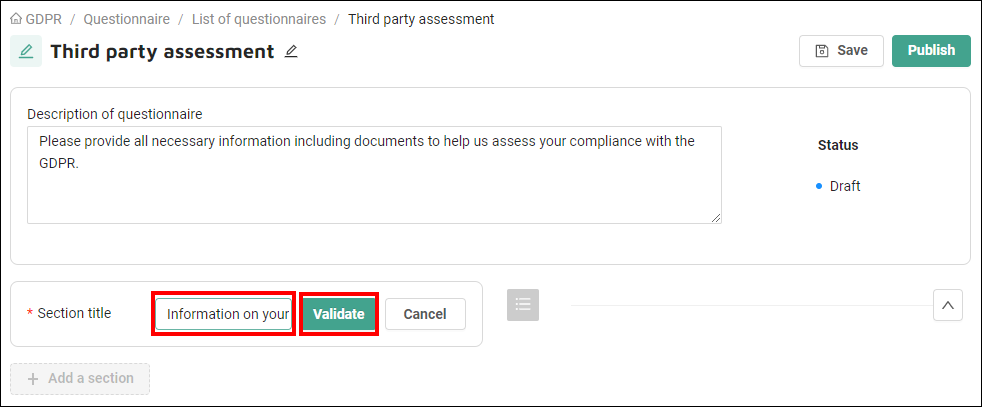
3. On the questionnaire's page, enter a Description of a questionnaire that will help recipients understand the purpose of the questionnaire and complete it.

4. Click the Add a section button.
For a better understanding, you can divide your questionnaire into sections. Each section can include one or more questions.
5. Enter the first section's title (e.g. "Information on your organization") and click Validate.
6. To create the first question of the section, click "+".
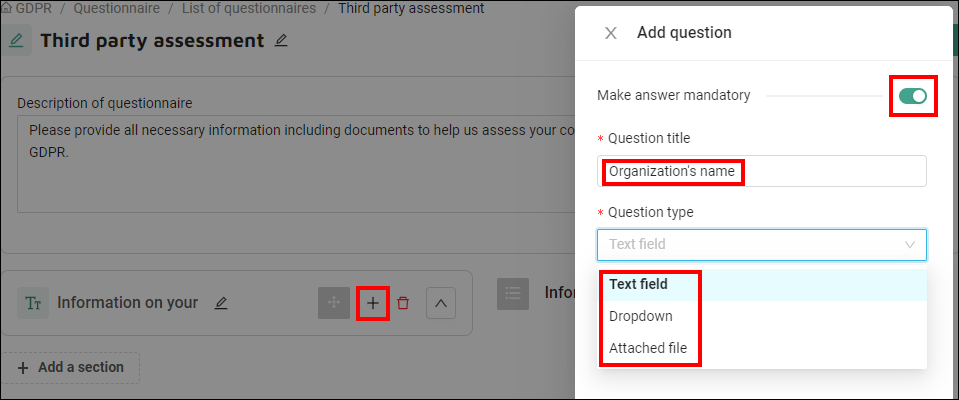
Then:
- Enter the question wording under Question title (e.g. "Organization's name")
- Choose the type of question you want to create:
- Text field allows the respondent to enter a text reply
- To create a multiple-choice question, select Dropdown and click the Add a field button for each item to be added. You can change the order of the items by clicking the arrows.
- Attached file allows the respondent to attach a document.
- Toggle the switch to Make answer mandatory if applicable.
- Then click Validate.
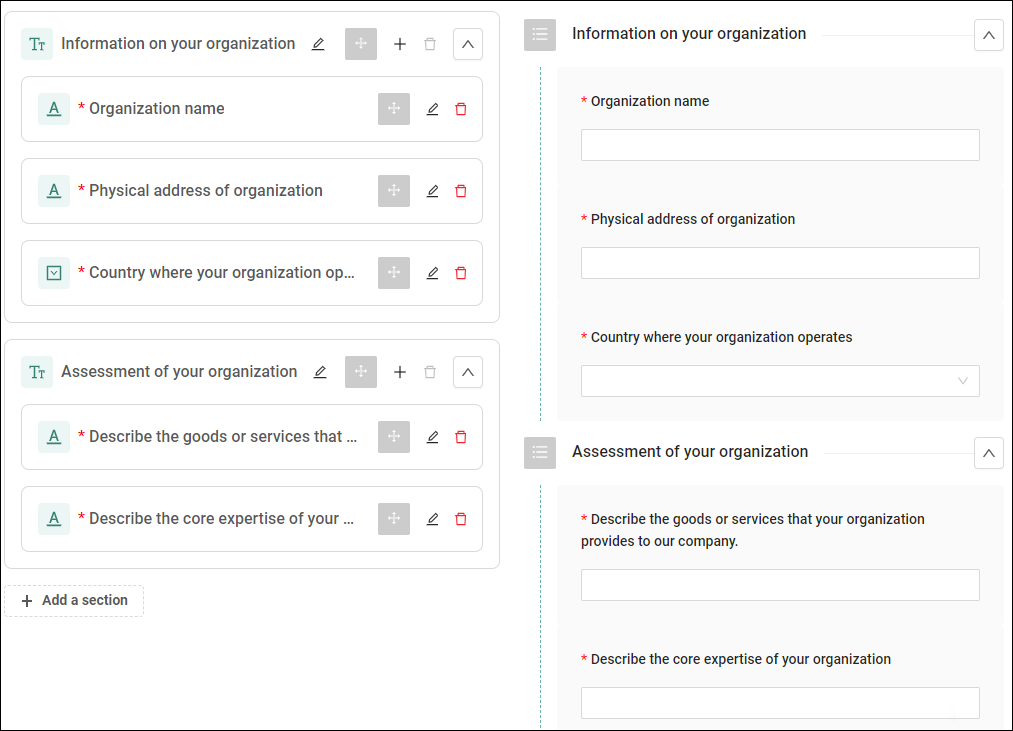
7. Repeat step 6 to create more questions in this section.
Click the "pencil" to edit the name of a section or a question set. Click the "bin" to delete a section or question.
8. Repeat steps 5, 6, and 7 to create other sections and questions. The questionnaire appears in the right-hand column in its output form.
9. When you have finished your work session, click the Save button.
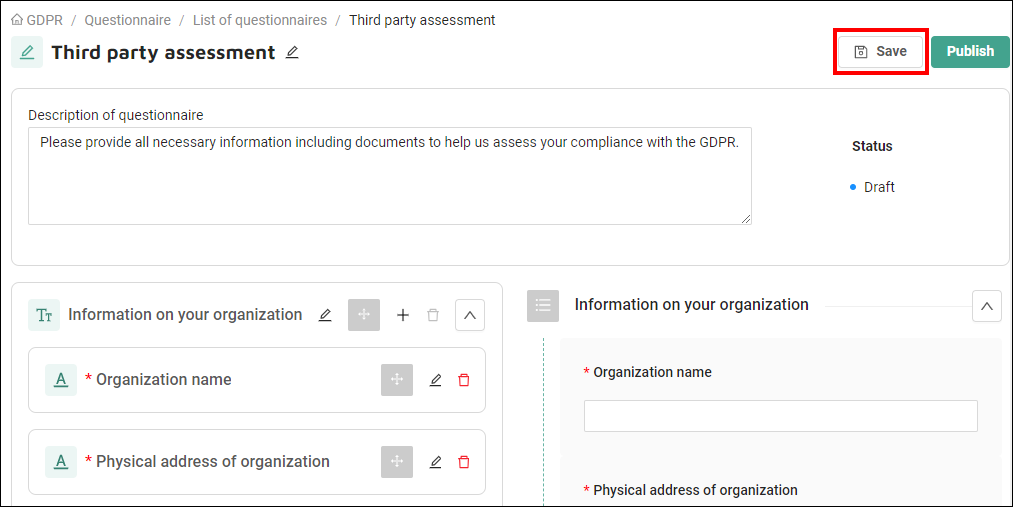
Important: questionnaires are not saved automatically! If you do not click the "Save" button and you leave the page, your work will be lost!
Questionnaires in Draft status cannot be used in surveys. To find out more about surveys, see Launching a survey
10. Once you have completed the questionnaire, and if you wish to make it available for use in a survey, click the Publish button.
You can edit a questionnaire without publishing the changes. To find out more, see Edit a questionnaire.
Edit a questionnaire
You can edit your existing questionnaires, or use the standard questionnaire templates included with the DLD GDPR software by modifying them according to your needs.
For more information on creating a questionnaire, see Creating a questionnaire above.
To edit un questionnaire:
- In the sidebar, click Questionnaires > Questionnaires.
- In the list of existing questionnaires, click the one you wish to edit.
- On the questionnaire's page, you can edit the Description of questionnaire.
- To edit the names of the sections and the question settings, click the "pencil".
- To delete a section or a question, click the "bin".
- When you have finished your work session, you have two options:
- click the Save button: this allows you to edit the questionnaire without publishing the changes. The unedited version of the questionnaire will continue to be sent in current or upcoming surveys.
- click the Publish button: the changes will be included the next time the questionnaire is sent to a recipient.
Important: questionnaires are not saved automatically! If you do not click the "Save" button and you leave the page, your work will be lost!
Delete a questionnaire
At this time, you cannot delete questionnaires. You can only edit them.
Launch a survey
Once your questionnaire has been created and personalized, the survey allows you to choose the questionnaire to be sent, the recipients who will receive it, and to monitor the status of their replies.
The Access to Campaigns page permission is required to create and monitor surveys.
To launch a survey :
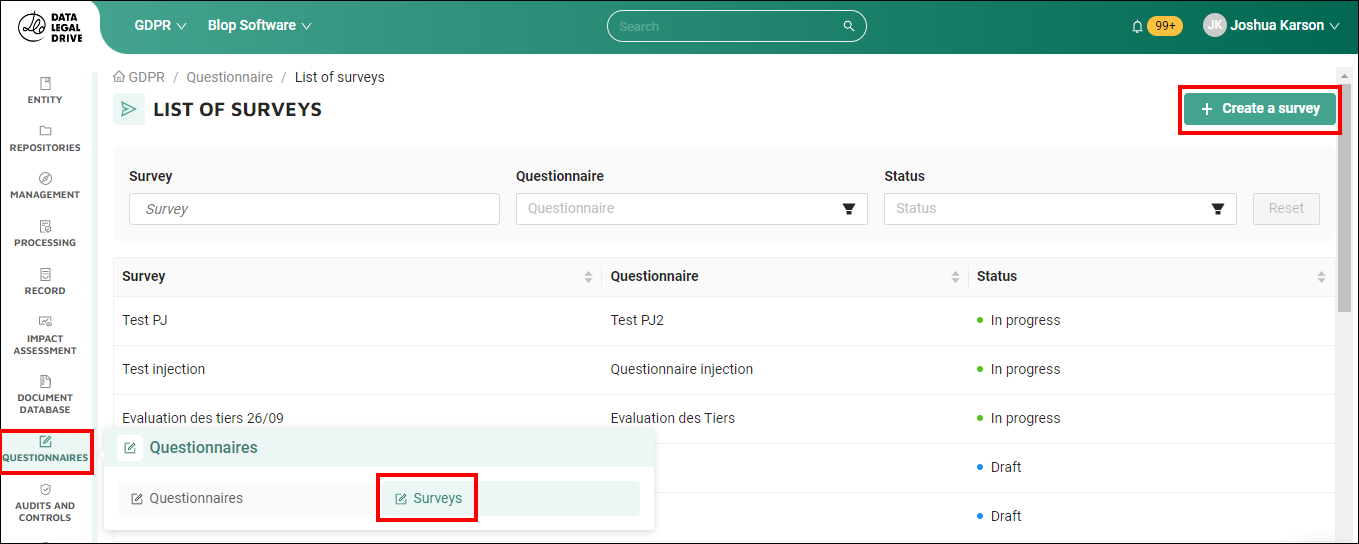
- In the sidebar, click Questionnaires > Surveys > Create a survey.
2. In the Create a survey dialog box, give your survey a title and click Create.
3. In the Settings section, select a questionnaire from the dropdown list.

4. In the Recipients section, click the Add recipient button to choose the entities that will receive the questionnaire. You have two options:
- Select one or more third parties from the list extracted from your third-party repository;

- Click New recipient. You can add recipients manually by clicking the Add button, or import a .csv or .xlsx file of recipients by clicking the Import button and selecting or drag-and-dropping the file. Imported recipients appear in the list. You can combine both methods: add recipients from the third-party repository and add recipients manually.

To make sure you use the correct format, download a template of each import file by clicking the .csv template and .xlsx template buttons.

5. Click the OK button. The recipients appear in the list.

If you click on an "x", you remove the recipient from the survey but not from the third-party repository.
6. Now that you've selected a questionnaire and chosen the recipients, click the Start audit button. A message indicates that the survey has started.
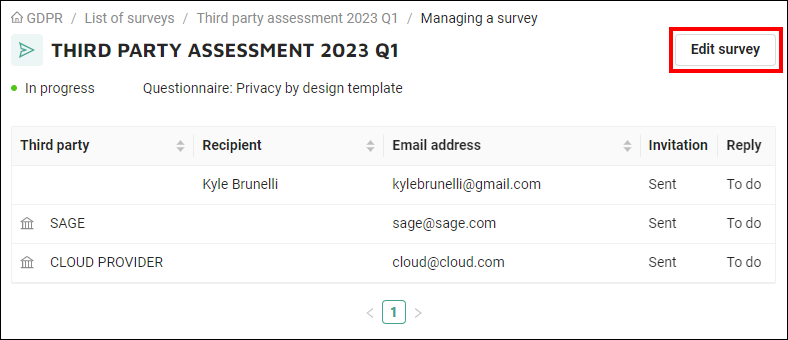
Want to add more recipients after the survey has been started? Click the Edit survey button and add them. Then click the Restart the survey button. This will not impact existing recipients.

7. The recipients receive an email with a Reply button that opens the questionnaire.
8. Once the questionnaire has been completed, the recipient clicks the Send my replies button.
A recipient can complete the questionnaire in several sessions. As long as they don't click the Send my replies button, they can resume completing the questionnaire at any time, even if they have closed their browser.
9. To monitor the status of the replies, click the Manage survey button.

You can view the status of each reply:

- To do: the recipient has not yet clicked the Reply button in their email.
- In progress: the recipient has clicked the Reply button in their email but has not yet returned the questionnaire.
- Completed: The recipient has returned their questionnaire.